
My construction company loves PLS laser levels. We own three of them: one PLS 2 and two PLS 5’s. The PLS 2 was purchased used around 2010, and a label under the controls shows the date code as “2/07″ so I assume that is when it was made.
Toward the end of 2012, the level stopped working. The laser lit up just fine, but the self-leveling function was out of whack. It gathered dust in my shop until last week, when I decided to get it fixed or replaced. It so happens that PLS headquarters are not far from me, so I figured I would drop by to see what could be done. The receptionist informed me that these older models do not get repaired (apparently only the rotary models can be serviced), but she mentioned I could exchange my old one for the latest version, and at an appreciable discount. That would still mean around $200 plus tax; I replied I would think about it.
Back at the shop, I decided to disassemble the level to see what was wrong. I figured the issue was more likely to be mechanical than electronic, so why not check under the hood?
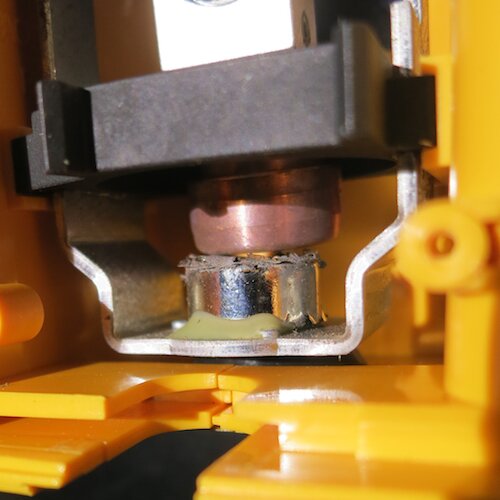
I was glad I did. After I disassembled it, the problem became visible immediately. With the level standing upright, you will see a round magnet at the bottom. I suppose it used to be covered entirely with a thin layer of shiny metal, and this layer had completely deteriorated at the top of the magnet. Now, the bottom of the pendulum (the copper-colored part), which sits right above the magnet with very little clearance, can no longer swing freely, as it is obstructed by metal fragments.
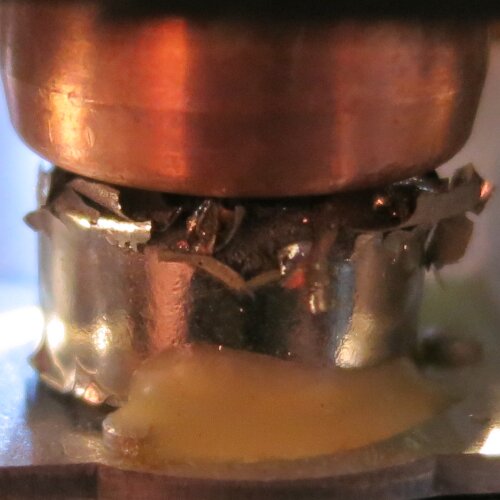
With a pair of Uncle Bill’s tweezers and a thin-bladed knife, I removed as many of the fragments as I could. Keep in mind that the magnet is powerful, making removal with metal tools a little challenging. Remember, too, that these fragments do not mix with the electronics inside the unit. It might be a good idea to hold a vacuum cleaner nozzle right above, so fragments will be removed rather than dispersed. In any case, in less than twenty minutes the PLS 2 was back in business. Total cost: $6.49 for a specialty screwdriver.
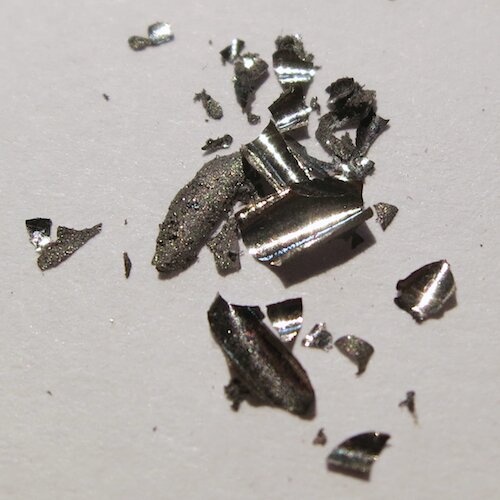
I believe this delamination problem is not a matter of wear and tear, but a defect in design and/or manufacturing. It is my impression that Pacific Laser Systems is a reputable company that cares about its customers. If your PSL 2 acts like what I described here, give them a call and see what they can do for you. Please leave a note below about the result.
If you decide to take the PSL apart:
- Remove the back cover and take out the batteries
- Use a T6x40 screwdriver to remove the four screws
- Carefully pull the housing apart. Be mindful of three thin copper wires that connect one side of the housing to the other
- Turn the unit so the front (where the lens is) faces down
- Pull up and out the brass thread mount
- With small needle-nosed pliers, gently pull the metal frame upwards. The black rubber gaskets are all that keep it in place.
- As always, do this at your own risk. Your warranty, if you have one, will most likely be toast.
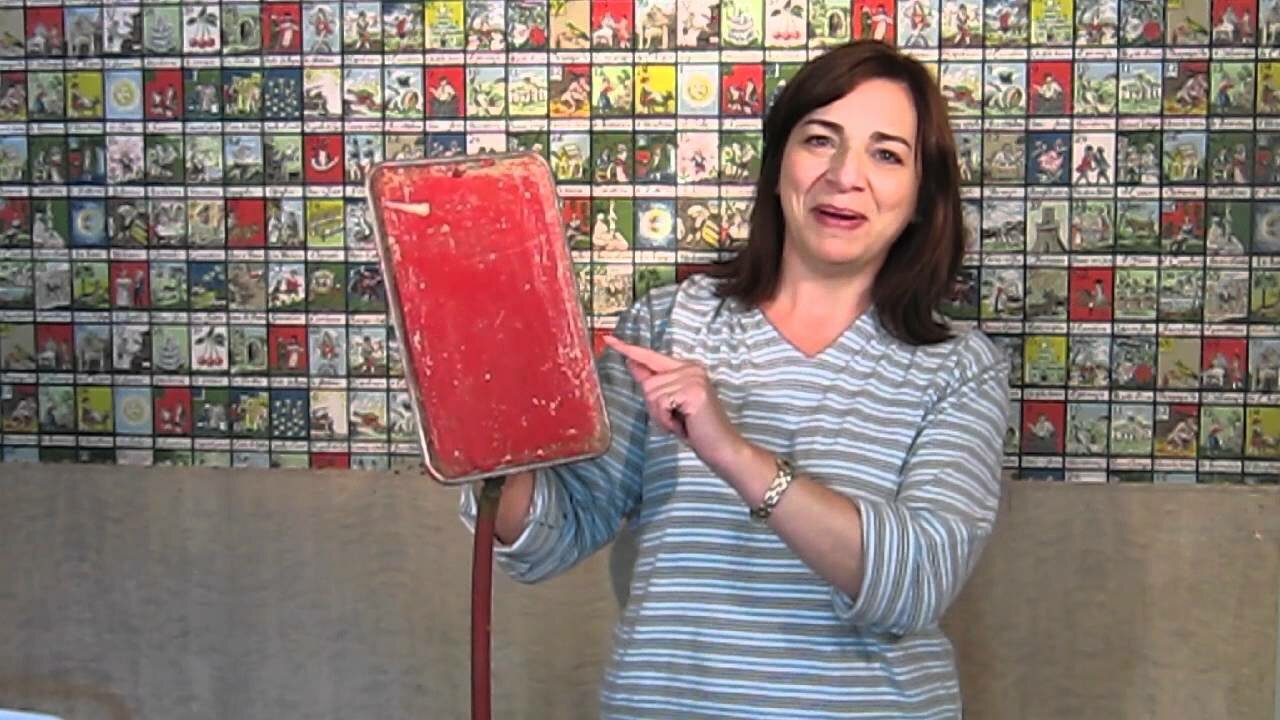
When you look online, you will find a TON of articles and videos about how to get rid of wallpaper. This video was published before and shows how to remove it. Some people recommend chemicals, others use vinegar or hot water, and some love using a steamer. What is noteworthy is that for every success story there is a tale of failure and frustration. Why?
The answer is simple: there are different kinds of wallpaper! Some are fairly thin, and come down as entire sheets faster than you can say “I love chocolate.” Others are made of thick, designer-type paper that will not come off no matter how much you soak, spray, or steam. This is what Melinda (featured in video above) and I ran into, and here is how we solved that problem.
We left the second layer of paper on the walls. We carefully inspected all the seams and corners to make sure they were in good shape. If you find any that are not, use some glue to make sure everything stays in place. Remove all nails, screws, and hooks you come across. Mask all surfaces you do not want paint on, and remove cover plates from light switches, electrical outlets, and so forth. Next, using a full-sized roller cover and paint tray, paint all wallpaper with an oil-based, fast-drying sealer. You will want to wear a suitable respirator and open doors and windows for ventilation, as the sealer vapor is toxic. Depending on the wallpaper and how much it absorbs the sealer, you may need to apply a second coat. You will love how this sealer will begin to hide that awful wall covering.
Next, find yourself an experienced drywall finisher. This person will apply drywall tape or mesh to all the seams, and then float these seams with drywall compound, known in the trades as ‘topping.’ In Melinda’s house, we asked the drywall finisher to ‘float’ (or ‘veneer’ or ‘skim coat’) all the walls. This means a thin layer of compound is applied onto the sealed surfaces.
TIP: If you have crown moulding or other trim that has a narrow profile, tell the drywall pro to feather the veneer along the moulding’s edges. If that is not done, the edge of the moulding’s profile will disappear and look strange.
After the skim coat dries, a vacuum sanding system is used to lightly sand it, leaving a beautifully smooth surface, ready to paint. Or, instead of the veneer, you can have the walls textured. This will be cheaper and a bit more forgiving if your walls contain a lot of irregularities.
TIP: Make sure a bright floodlight is used when the veneer is sanded. The light will make imperfections much easier to see. Use of a vacuum system is also important. This type of dust is very fine and will travel *everywhere*. Covering up any furnace vents is a good idea, too.
Now you will be ready to apply a regular, water-based drywall primer. An added benefit of this primer is that, once dry, it allows a much better view of the quality of the drywall finishing work. Look at where the seams were taped. Hold a straight edge across the seams horizontally, and if there are noticeable bumps, ask the finisher to float out that area more. Simply use a pencil and mark the areas that need attention. The extra veneer and drywall primer will cover the pencil marks eventually.
In case you are wondering about the purpose of oil-based sealer, the reason is that the skim coat contains a lot of moisture. To prevent that moisture from weakening the wallpaper adhesive, you will want to apply a barrier between the paper and the veneer.
Do you know of better ways to deal with annoying wallpaper that won’t come off? Please let us know in the comment section!
]]>
The SF Bay Area received some much-needed rain Friday night, and the end of this week will bring more. We are slowly but surely moving toward winter, and it is time to take a look around the house and make sure we are ready.
Let’s start outside:
- Are the gutters clean and downspouts clear? A single story home is easy to check yourself, but taller and/or hillside houses may need a professional with tall ladders.
- Where does rain water flow to? Down to the ground, right next to your foundation? Not a good idea. Even so-called splashblocks, which are wedge-shaped pieces of plastic or concrete, about 18 to 24 inches long, meant to guide water away from your house, are not adequate. Ideally you have underground drain pipes leading water away to the street, to a catch basin, or any other destination where water will not impact your home.
- Another option is plastic drainage sleeves. They are attached to the bottom of downspouts (I use plastic ‘zip’ ties as fasteners) and then rolled out and away from the foundation. Do not buy products that are just a few feet long; instead find something at least 8 feet or longer. Remember that you are likely to lose a few feet just by connecting it to the downspout. Some hardware stores sell it in bulk and can cut it to whatever length you want.


- Take a look at all windows and doors. Do they close properly and make good seals against rain and wind? Hopefully you took care of any caulking and painting during the summer, but if not, now is a good time to make quick repairs. Once the temps start to dip, caulk and paint will not cure properly. I sometimes cheat and use a heat gun to help the curing process along.
- What about exterior lighting? Are all bulbs and light sensors operational? Next Sunday daylight savings goes into effect, and it will be dark earlier. Do any timers need adjusting? Speaking of timers, maybe now is good time to check on your garden sprinkler system. Perhaps it should be set to ‘Winter’ mode, or be switched off.
- If you live in an area where frost is a typical companion, make sure to empty and put away garden hoses. Protect any exterior water pipes with insulation.
Inside your home:
- When is the last time you checked the furnace filter? Modern homes are built so airtight that they easily trap allergens, dust, and other irritants. Especially if you have pets, check the filter quarterly. They are generally easy to replace or clean, depending on the type of filter used. A clean filter also puts less strain on the furnace blower motor.
- If you have a gravity furnace or other kind of gas-fueled heater, make sure the pilot light is lit, and that there are no flammable objects nearby.
- Is your propane tank filled? Are you stocked up on wood pellets? Firewood and kindling?
- Take a look at smoke and C02 detectors. You need one smoke detector in each sleeping area, and in each hallway outside these sleeping areas. You also need one carbon monoxide detector on each floor. Combination smoke/carbon monoxide detectors are available. Photoelectric detectors are much better than ionization types, as they detect smoke and alert you much faster. In fact, many cities no longer allow the ionization technology. Here is a good explanation.
- Fire Departments around the country recommend testing smoke alarms each time you change your clocks.
Do you have some good tips about getting ready for winter? Please let me know and I will share them next time.
]]>
In a post published last year, I wrote about creative use of reclaimed wood. While most content on this site is about home remodeling, retail stores and other businesses can (and do!) the same.
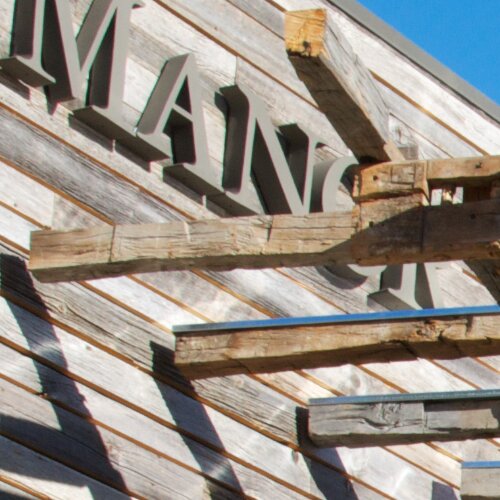
A good example is a local branch of Port & Manor that opened in San Rafael, California, not long ago. Before the store opened to the public, the owners remodeled the front entrance. An overhead trellis was added, using all salvaged beams and boards. They added galvanized sheet metal caps to the top of most boards so they will not be affected by rain water that puddles and eventually causes rot.

Instead of using stucco to cover all the exterior wall surfaces, they covered some parts with horizontally placed, recycled boards. The store’s appearance essentially signals the products one can expect to find inside: vintage furniture, semi-antique decorations, and recycled items. What all their merchandise has in common is that they are made from sustainable materials. I like how this company added an attractive flair to the outside of their store. Good job, and smart communications!

Salvaged wood at Port & Manor
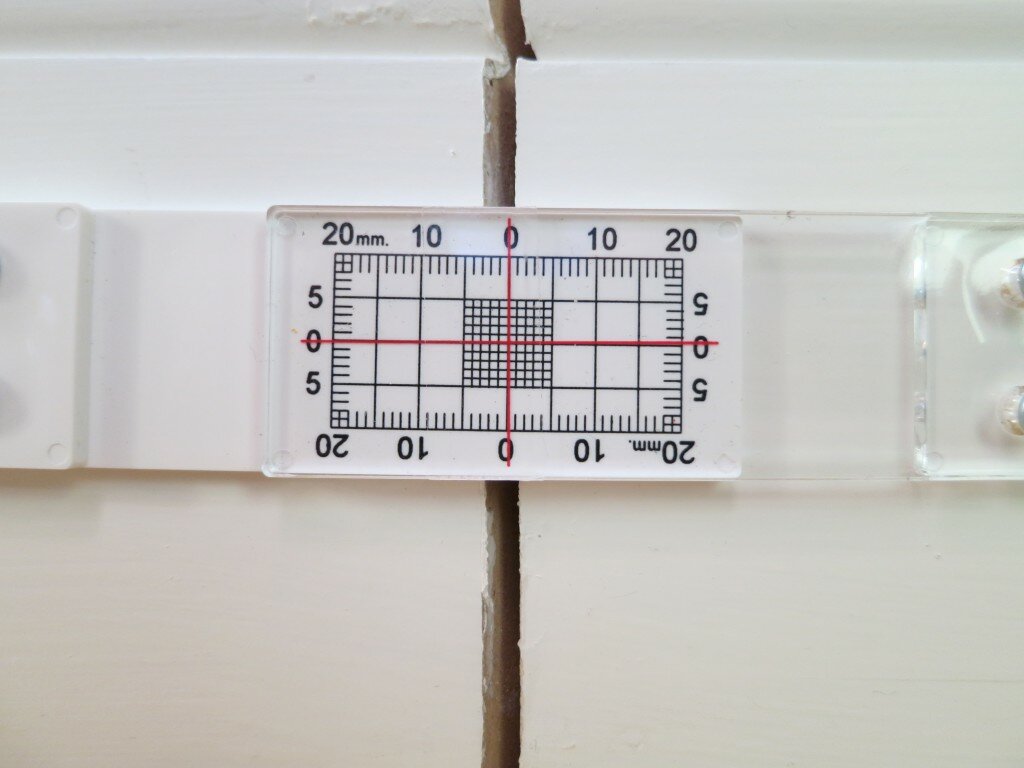
Here is an easy way to keep track of movements of concrete, stucco, flagstone, or any other material you can think of.
Structural Puzzle
One of our clients has a house that sits perched on a hill east of San Francisco. This area is prone to earthquakes, and soil on hills has a tendency to move. At some point she noticed how a mitre joint in the living room baseboard had opened up significantly. There were also some cracks in adjacent drywall, so she gave us a call and asked we take a look. Together with her architect, we discussed the options. It seemed not worthwhile to start tearing the area apart. We looked in the crawlspace for more evidence of structural problems, but none were readily visible.

Enter the CrackMON
We installed a CrackMon device on the baseboard. It is inexpensive, easy to install and monitor. Our unit included both screws as well as two-part epoxy plus an applicator as ways to mount the unit. In the case of our client’s baseboards, epoxy is too difficult to remove, so we opted for screws.
The monitor was installed in January 2014; checked in June of the same year; and checked again three months later. The photos show how a joint that had separated more than 1/8″ is slowly closing up. Unexpected, and we wonder what will happen over the next six months.
Overall, this is a very simple yet effective way to keep an eye on horizontal and/or vertical movement. Undoubtedly we will install more of these in the future. A recommended product.
]]>
Earlier this week, I noticed some small charges to my VISA card. $0.99 for an iTunes movie rental; $1.05 for a Berkeley parking meter; and $1 for something related to TransUnion. I could not recall what that might had been. Fearing a deluge of scam-related charges, I went to investigate.
I called TransUnion, and indeed, someone named Bobby Watson charged my card for a subscription. I did not care about the buck, but suspected that someone might be making thousands of dollars off such small charges. Nobody is likely to miss a dollar, and most folks are simply too busy to pursue it even if they caught it.
A few years ago, someone in the UK charged my account $200 twice, for Skype credits. It was my business account, and I rarely looked at the statements. By the time I caught it, the bank made me file a police report. The cops chastised me for having waited so long. “We could have helped you.” Yeah right, like the police in my town (population 12,491) is going to fly to the UK to catch some idiot for $400? Anyway, eventually Bank of America credited my account for all of it, but not without making a big fuss.
Moral of the story? If you have the option, hop online and check activity on your accounts often. Should something be wrong, the sooner you act, the better your chances of getting your money back.

The New York TImes reports today on how Israel is mitigating a shortage of much-needed rain by desalinating seawater. California, reeling from its driest winter in history, has a long coast line and the same opportunity as Israel.
Of course, the problem with desalination is that it requires a lot of energy. According to the article, ten percent of Israel’s total electrical consumption is used for desalination efforts. As California gets plenty of sun, this power could be generated by solar energy collection. However, and as described in an earlier article on this blog, solar energy generation requires a lot of cooling, which is generally addressed with water.
While corrosive, seawater can be used for cooling, but the warm water that is returned to the sea does add to global warming. Clearly, the entire process is a balancing act. It is said that necessity is the mother of invention. As the need for water grows, so will development of new technology to meet this demand. California can only raise prices and restrict water usage to a certain point. Homeowners grow tired of looking at grey lawns, and farmers and industry do not want to keep raising prices. Maybe it is time desalination technology receives another look.
There are more ways for California to save water:
prohibit sale and installation of garbage disposers. They waste lots of water, are hard on plumbing systems, and are largely unnecessary.
develop and encourage the use of grey water systems. Speed up the process of including this technology in building codes
Prohibit seafaring vessels, including those operated by the military, from dumping waste overboard. Garbage and sewage needs to be offloaded ashore or onto other vessels for proper treatment and disposal.
]]>
Now that an official drought has been declared in California, many people remind themselves that “When it’s yellow it’s mellow; when it’s brown flush it down.” That was fine and well during the days of toilets that used nine gallons of water to keep waste moving. With today’s modern toilets that use between one and two gallons, however, flushing each time is crucial.
About five years ago, we remodeled a client’s bathroom and installed a Toto wall-mounted dual-flush toilet. She figured that she could save even more water by not flushing when it was not absolutely necessary. As a result, the lack of water prevented toilet paper from moving along, and began to accumulate in the sewer line. Eventually the line clogged, and a plumber was needed to fix the problem. Contrary to typical floor-mounted models, a “snake” can not be used with the wall-mounted type. The toilet had to be removed and reinstalled. Save yourself the unnecessary expense and headache. If you have a low-flow toilet, be sure to flush after each use.
Oh, the photo? It is a poo-powered motorcycle, called the “Toilet Bike Neo.” Toto says it wants to raise awareness of water waste. There are no plans to make this bike available commercially.
]]>
Leave it to those Amsterdammers! Famous for their red light district, Old Dutch Masters, and gorgeous canal houses, one is now being built with a 3D printer.
A few weeks ago, Annemarie Coevert of the Dutch newspaper NRC Handelsblad reported how DUS architects designed the world’s first building being constructed with a 3D printer. Visitors can observe the printer, built by the same architecture firm, and nicknamed “de kamermaker” or “roombuilder.” Here continues a rough translation of the article:
The onsite construction trailer has blueprints on display (President Barack Obama visited the site last week), as well as scaled-down 3D versions of each of the house’s 13 rooms, available for purchase. While a Dutch building contractor as well as a German material’s supplier are involved in the construction process, more funding is needed to complete the canal house.
Although it has been decided that the building’s facade will be of similar design as the Cubist style used in Prague over a century ago, many construction details remain unknown. “3D printing is a totally different way of building,” explains Hedwig Heinsman from DUS architects. “Only the shape of the 3D canal house resembles a typical old canal house. For the rest it differs completely from a traditional building.”
According to DUS, the idea behind this project is to come up with new ways to construct buildings efficiently with recyclable materials. The 3D canal house should become a prototype for a building technique to be applied all over the world.
This is exciting! Yes, a great deal needs to be figured out, but the concept of new methods and sustainable materials is something we can not afford to ignore.
Learn more about the canal house.
]]>According to the architect’s web site, the design features a [550-foot] tower on one end of the block with two podium buildings and a row of townhouses filling the remainder of the block. The future construction site, located between First and Fremont Streets along Folsom, is on a parcel currently owned by the City of San Francisco.
City Insider also reports that the last time the City approved a Koolhaas design, it was for a Prada building near Union Square. Featuring 8,000 port holes instead of windows, critics compared the building to an oversized cheese grater. Holland > Gouda > cheese grater? That’s pretty chee_y. Yeah, you said it.
Take a look here to see a mock-up of the design.
Once construction gets underway, I will be sure to visit the site and publish an update.
]]>